English version was created automatically using Drupal module auto_node_translate and free DeepL translator.
How to transfer Windows 10 to an M.2 SSD without reinstalling the system using Clonezilla and partition backup
published on 2020-08-19
There are many instructions on how to copy the system to another disk. But most of the tutorials (Acronis Disk Director, AOMEI Backupper ...) assume that a new disk is attached to the running system and the system is transferred to it. However, if we don't have the possibility to mount the new disk directly, we need a tool like Clonezilla, with which we can make an image of the original disk, and after replacing it with a new one, we can move this backup to it.
I got into years beautiful ultrabook ASUS ZenBook Flip UX360UA from 2017, which was installed M.2 SSD with a capacity of 256GB. And since it was running out of space, it was time to replace it with a new Crucial MX500 1TB M.2 2280 SSD. But without an AXAGON EEM2-U3 ALU type reducer https://www.axagon.eu/produkty/eem2-u3 I could not transfer the system so easily. So I remembered the tried and true Clonezilla https://clonezilla.org/. So what all did I need to do to transfer the system.
1. Preparation
So what did I need for a successful transfer?
- External USB drive - with enough capacity to fit all the data "normally" copied, and also the actual partition backups
- USB flash drive - to create a bootable flash drive with Clonezilla, and then with Knoppix
- Torx T5 screwdriver, since this Zenbook uses really tiny torx screws
2. Backup
There are a million instructions that have worked for a lot of people. But I don't want to be one of the few that loses data and doesn't have it backed up anywhere. So definitely backup your data first - to the cloud, or just to an external drive. I'll leave it up to your discretion whether it's better to copy the data directly in Windows, or maybe even from Knoppix, which will allow a copy in Windows of otherwise inaccessible (e.g. used) files.
Don't think that if the cloning fails, you can always get the original drive back. Just get the drive letter wrong, and you're already formatting the original one, for example. I wouldn't risk it.
3. Clonezilla - backup
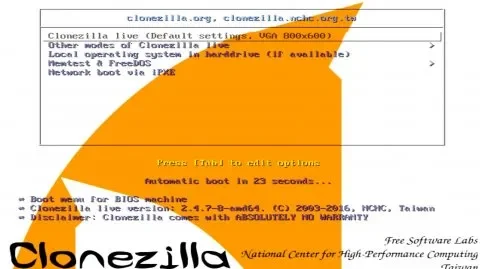
Download the ISO of the latest stable version of Clonezilla https://clonezilla.org/downloads.php. For example, use the Rufus tool https://rufus.ie/ to create a bootable USB drive.
Now we can boot and run Clonezilla - leaving the default language and key layout.
Backup MBR / GPT
dd if=/dev/sda of=/path/to/MBR.img bs=512 count=1
or for GPT
dd if=/dev/sda of=/path/to/GPT.img bs=2048 count=1
I recommend doing both.
Copy device-image
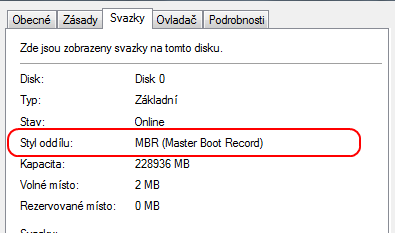
Now it comes to the partitions themselves. It's pretty easy to select what and where we want to backup. But then we must not run into a problem like: This disk contains mismatched GPT and MBR partition: /dev/sda. The solution is to remove the unnecessary header. But it is best to find out which one to delete after booting into Windows, and there, via Device Manager (not Disk Manager), check Properties " Volumes.
So we want to delete the GPT, which we'll do back in Clonezilla using the command
sudo gdisk /dev/sda
After fixing this problem, we can really start copying data to the external drive.
4. Replacing the disk
If we have a proper Torx T5 screwdriver, we simply remove about 10 screws. Then, carefully lift off the bottom of the laptop. The SSD is nicely accessible, attached with one screw. So we can easily swap the drives. I wouldn't put the bottom part back yet, we can do that later - when we're sure the new drive is working properly.

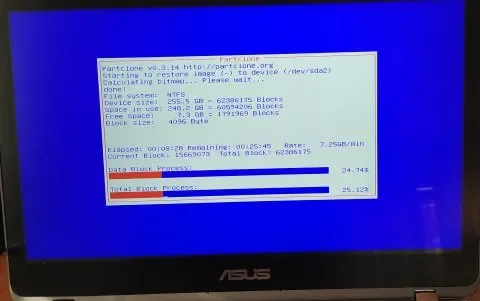
5. Clonezilla - Restore
Boot Clonezilla again.
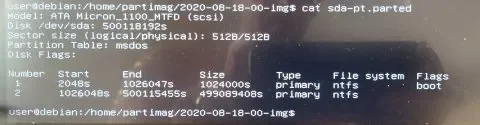
Preparing partitions
In the backup directory on the external drive, there should be a file called sda-pt.parted. Use it to create the appropriate partitions on the new disk using fdisk, for example.
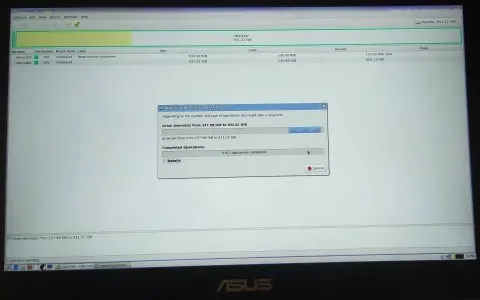
Copy device-image
Once we have the partitions ready, we can upload our backups to them.
Restore MBR
dd if=/path/to/MBR.img of=/dev/sda bs=512 count=1
Now we can reboot the computer, and it should boot into Windows.
6. Partition Enlargement
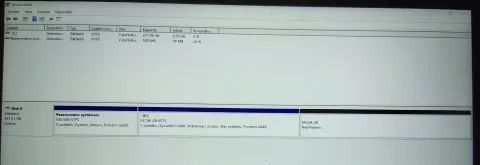
Since we made a 1:1 copy, we also have the same size partitions, so we are not using the full capacity of the new disk. This can be easily changed. We can create a new partition in the free space, but more likely we may want to enlarge the existing one.
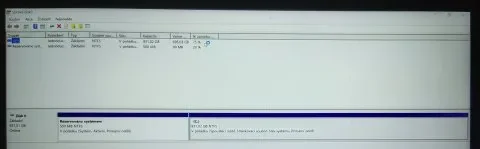
Knoppix - GParted
We'll create a disk with Knoppix, then run GParted after booting. There we can simply expand an existing partition. Then we confirm the changes, and in a few seconds we're done.
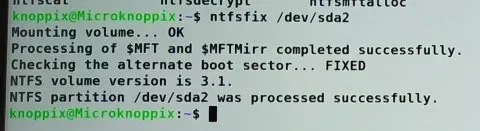
But before we boot into Windows, we still run the command
sudo ntfsfix /dev/sda2
Otherwise Windows wouldn't recognize the applied changes.
That's completely done.
7. Conclusion
Moving the existing system to the new disk is not difficult, even if we need to do an intermediate step of backing up the partitions to files first, which we then restore to the replaced disk. A few problems may arise, but we can solve those now.
Finally, there are some tutorials that have helped me:
How to Migrate Windows 10 from HDD to SSD Using Clonezilla
https://www.tecmint.com/migrate-windows-10-from-hdd-to-ssd-using-clonez…
Clonezilla fails at cloning with mismatched GPT and MBR partition
https://superuser.com/questions/884608/clonezilla-fail-at-cloning-with-…
How can I resize NTFS partition in GParted?
https://askubuntu.com/questions/72344/how-can-i-resize-ntfs-partition-i…
Format USB drive to NTFS so it is usable under Windows
https://askubuntu.com/questions/934560/format-usb-drive-to-ntfs-so-it-i…